

Hello folks! It’s been a while since I’ve published a piece, but what better way to resume than diving into a topic that’s been rapidly gaining attention among developers. In this blog, we’ll delve into getting started with Compose Multiplatform, alongside crafting API using Hasura on MongoDB Atlas.
Background
Undoubtedly, Kotlin has emerged as the favoured language among Android Developers for its seamless and intuitive nature, which expedites the app development process, allowing developers to create and deliver robust applications with ease and efficiency. However, its utility was previously confined to the Android platform. Thanks to JetBrains, this paradigm has shifted with the introduction of a framework that empowers Android Developers to write code capable of being shared across multiple platforms.
Compose Multiplatform is an extension of Jetpack Compose, Google’s UI toolkit for Kotlin-based Android app development. It extends Compose’s capabilities beyond Android to platforms like iOS, desktop, and web. This empowers developers to write UI code once in Kotlin and deploy it across various platforms, enhancing code reusability and efficiency. Leveraging Kotlin’s multiplatform capabilities, Compose Multiplatform facilitates streamlined development processes and ensures consistent user experiences across diverse platforms.
Prerequisites
Proficiency in Kotlin: Strong command over the Kotlin programming language is essential else you’ll be caught in a limbo when learning this.
Familiarity with Jetpack Compose: Understanding the basics of Jetpack Compose serves as solid foundation for the concepts and principles of Compose Multiplatform.
Understanding of UI Development: Basic grasp of user interface (UI) development principles, such as layout and user interaction.
Knowledge of Multiplatform Development: Understanding how to share code between different platforms. In this case, Kotlin Multiplatform.
Getting Started
Setting up the IDE: To explore the Compose Multiplatform experience seamlessly, without the hassle of switching between different IDEs or platforms like Xcode for Swift code, we’ll utilise Fleet IDE. This newly introduced IDE by JetBrains is tailored for precisely this purpose. Please follow this setup guide for Fleet IDE.
Creating the first Multiplatform project: Once the IDE setup is complete, the next step is to create a project where we’ll dive into the exciting process of coding and bringing our ideas to life. Please follow this guide for project creation.
Adding dependencies: With the project successfully created, the next step is to learn how to add dependencies to third-party libraries, an essential aspect for building successful cross-platform applications. Please follow this guide for adding dependencies.
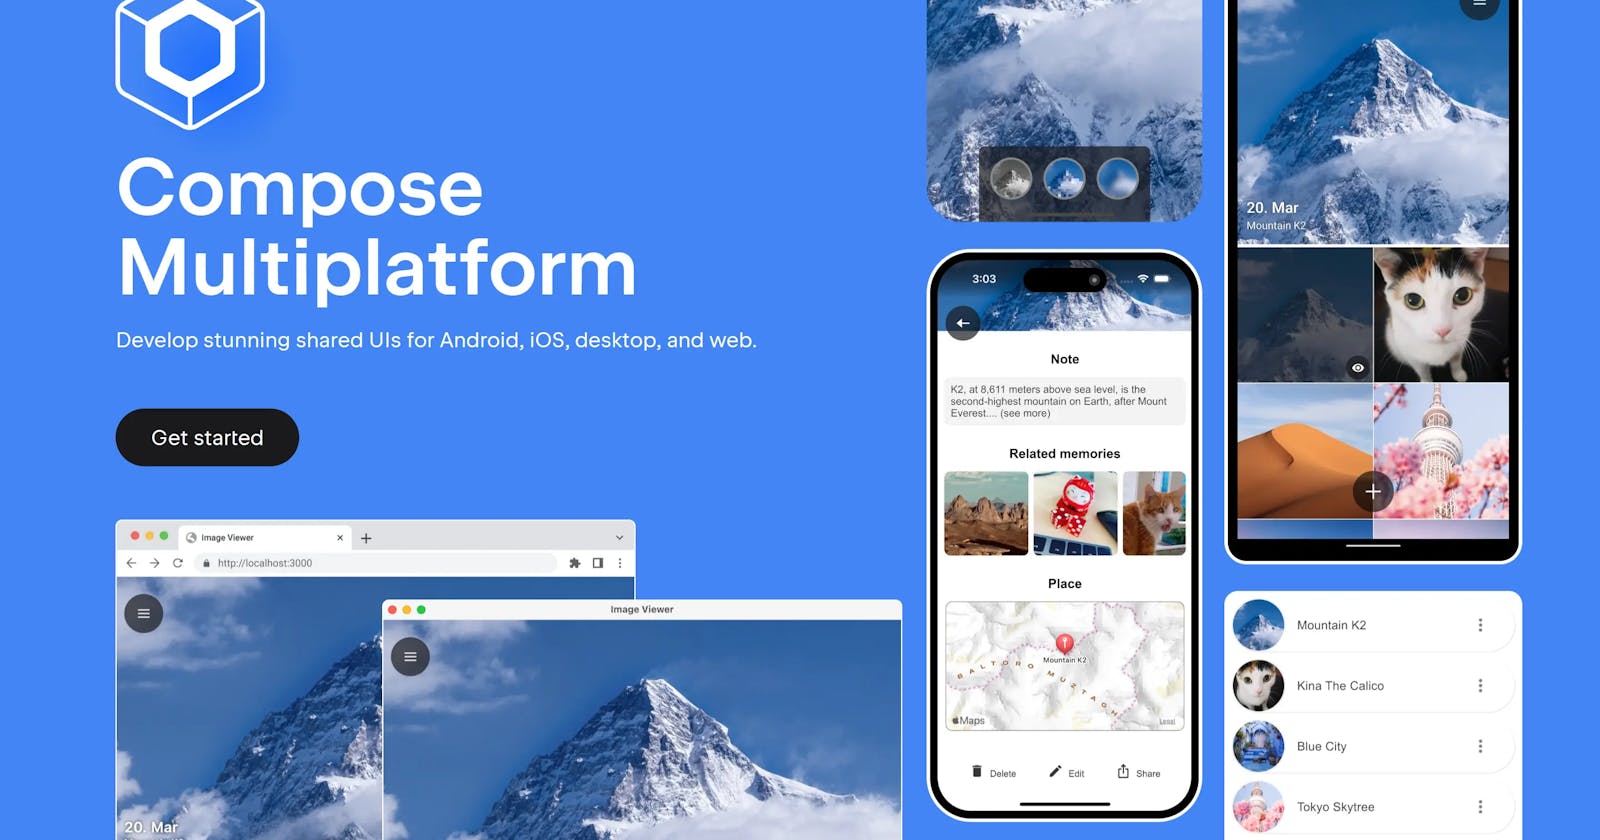
With the preceding steps completed, we’re ready to dive into coding and bringing our ideas to life. Below, I’ll share an app I’ve created to enhance understanding. Please follow along for a comprehensive walkthrough.
Demonstration App
The purpose of this application is to showcase a fundamental functionality: making API calls, managing data flow, and constructing user interfaces using Jetpack Compose. It is designed to demonstrate seamless rendering on both Android and iOS platforms.

MongoDB Atlas for hosted cloud database
I’ve utilised MongoDB Atlas for data storage - a fully-managed cloud database solution that simplifies the deployment, management, and maintenance of your databases across various cloud service providers such as AWS, Azure, and GCP. MongoDB Atlas offers unparalleled ease of deployment, scalability, and reliability, making it the optimal choice for hosting, running, and scaling MongoDB databases in the cloud.
Utilising Hasura to retrieve APIs from MongoDB via GraphQL
To develop the API for retrieving data from MongoDB, I’ve implemented Hasura - a versatile platform that seamlessly integrates with your databases, GraphQL servers, REST servers, and third-party APIs. Hasura facilitates the creation of a unified, real-time API that instantly connects to every data source. For instance, Hasura effortlessly maps Postgres database tables into GraphQL queries and mutations, streamlining the data retrieval process.
After successfully creating an account on Hasura, the next step involves creating a project. Within this project, we’ll connect the database and set up the necessary APIs.
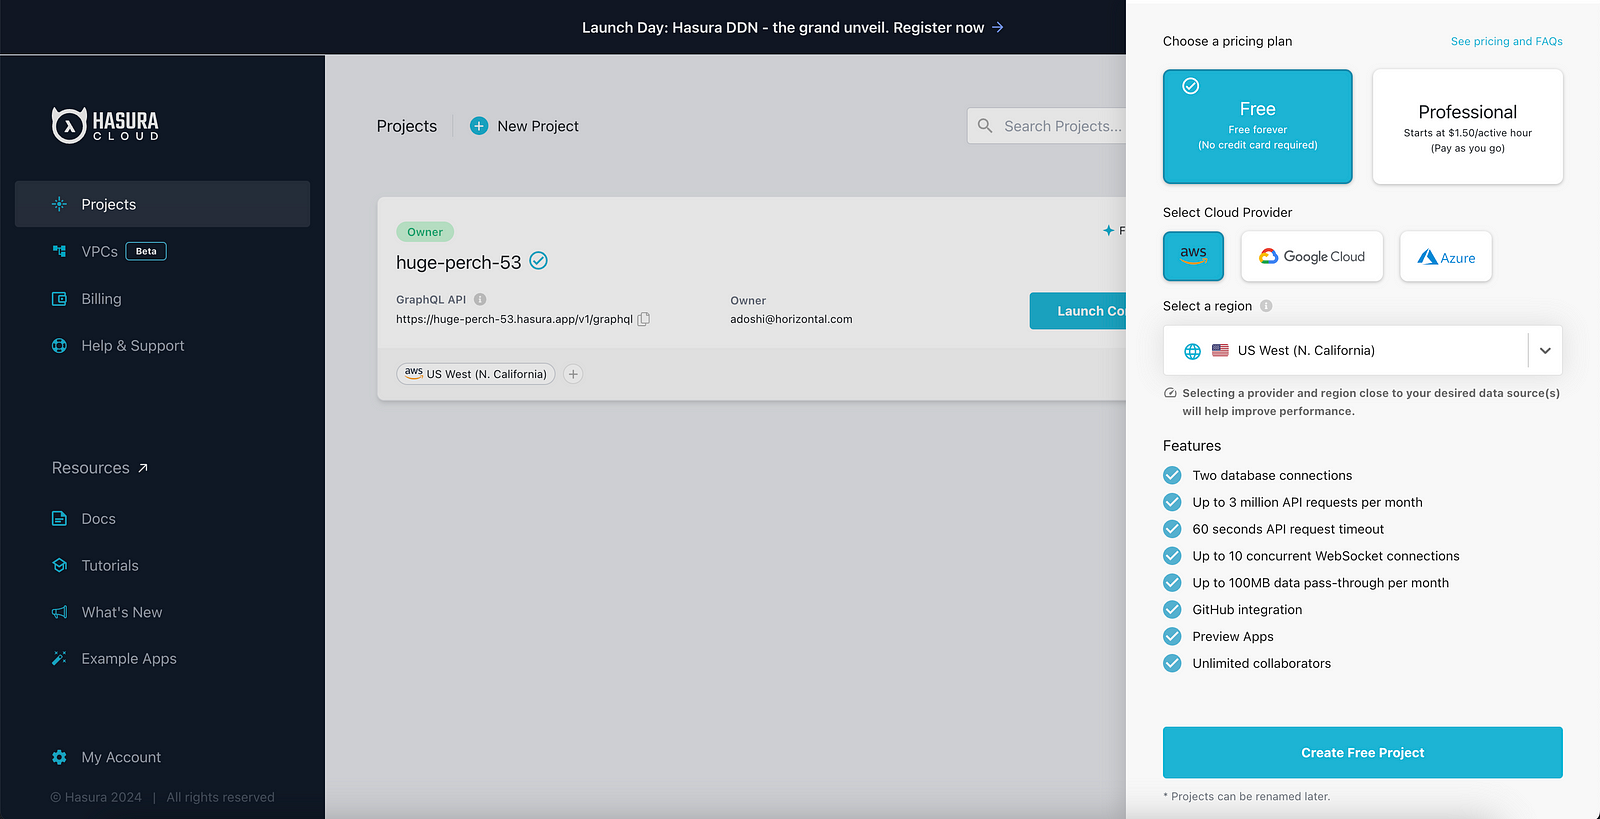
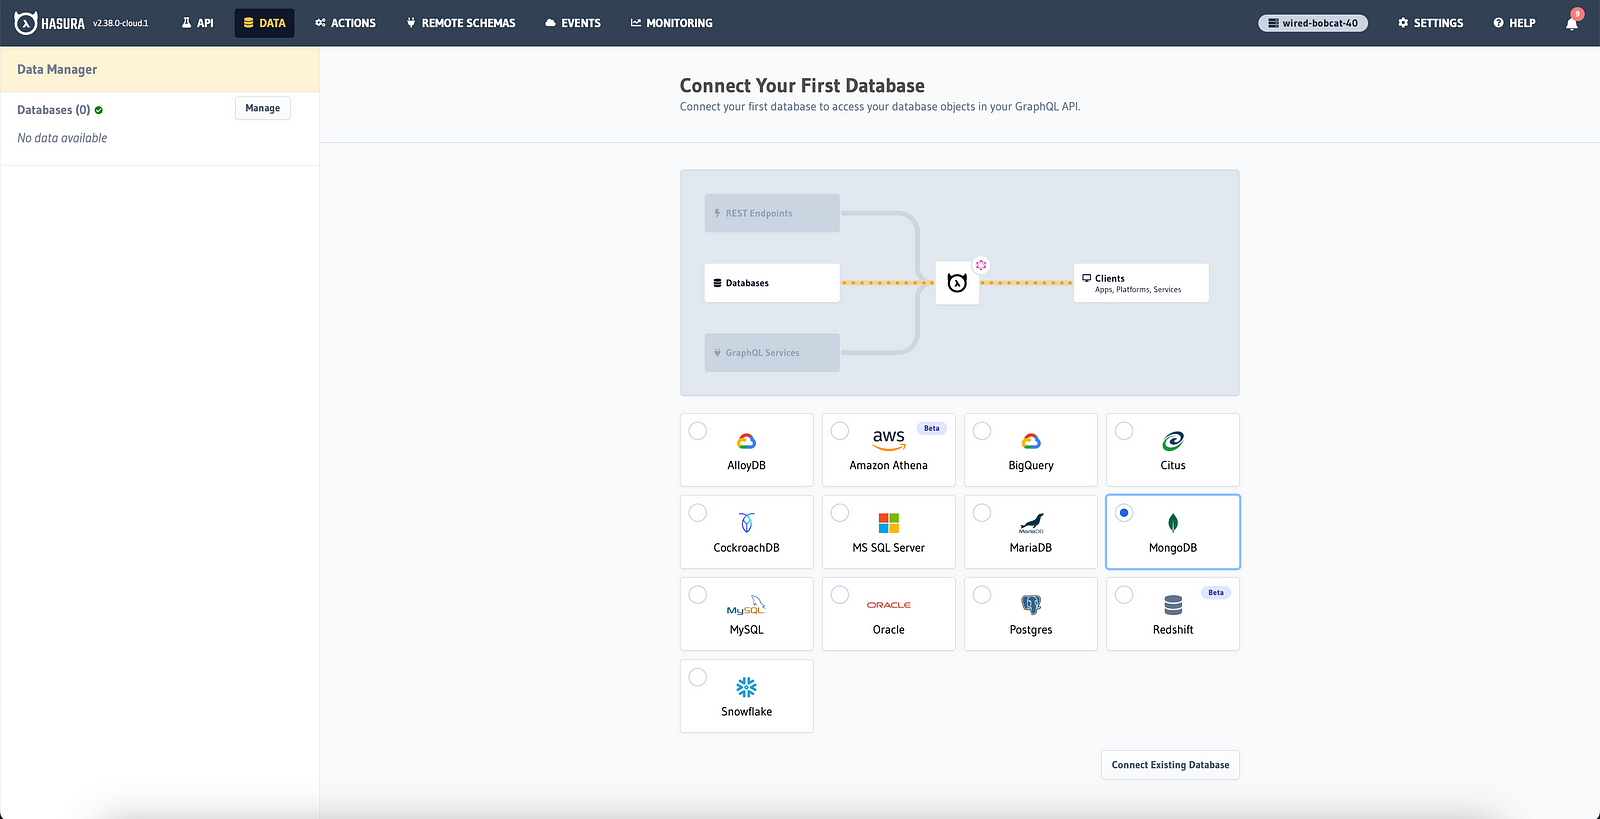
Integrating MongoDB Atlas with Hasura
To establish a connection between Hasura and MongoDB, you’ll need to follow a series of steps outlined in this guide.
After completing the previous steps, it’s time to create APIs. In Hasura, API creation begins with writing a GraphQL query. To initiate this process, we’ll navigate to the API section from the top menu, which will open an editor allowing us to test out the query, as depicted in the image below.
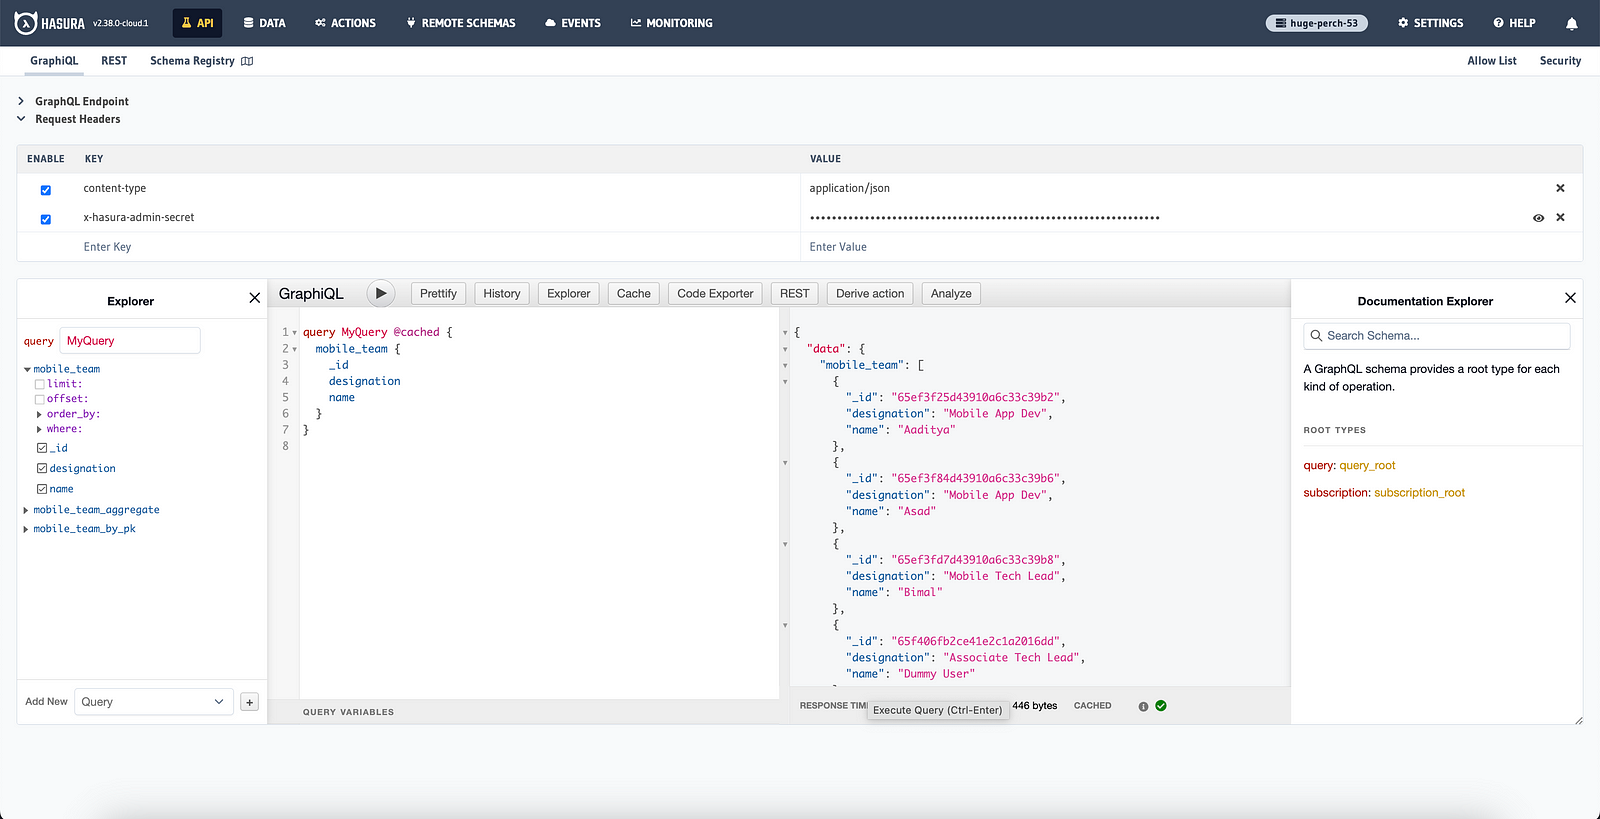
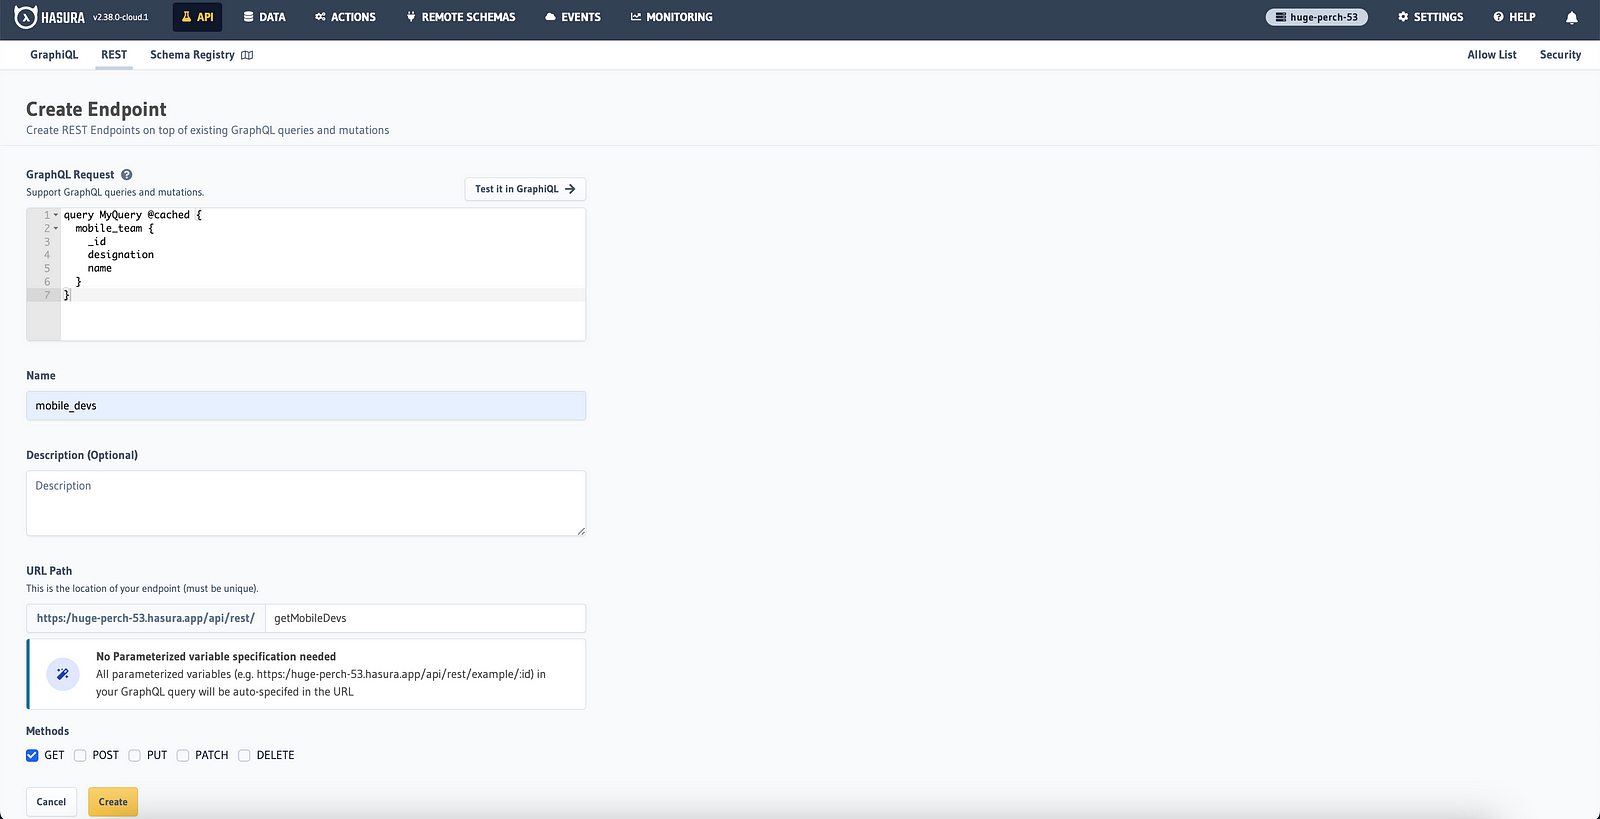
Once we’ve completed writing and testing the query, the next step is to create an endpoint for the API. To accomplish this, we’ll navigate to the REST section, where we’ll utilize the previously tested GraphQL query. Here, we’ll define the endpoint name and specify the type of request, as illustrated in the image below.
Let’s delve into the code
When beginning to explore the code, it’s crucial to first examine the directory structure of the app. Compose Multiplatform code typically comprises three primary components:
Android-specific code
iOS-specific code
Shared code
Understanding this structure sets the foundation for navigating and understanding the project’s implementation across different platforms.

In this application, there are two primary dependencies worth noting.
- Ktor: Developed by JetBrains, this framework facilitates asynchronous client and server calls. Known for its lightweight and flexible nature, it leverages coroutines and Kotlin at its core. This combination allows for concise multiplatform code, empowering developers with the capabilities of asynchronous programming through an intuitive imperative flow.
- Koin: Developed by Kotzilla and other open source contributors, Koin is an intelligent Kotlin dependency injection library designed to streamline your development process, allowing you to concentrate on building your application rather than managing tools. With Koin, you have access to straightforward tools and APIs that enable you to seamlessly integrate Kotlin-related technologies into your application.
Koin is initialized for both Android and iOS platforms by invoking the initKoin() method within the application classes of the respective platforms.
After configuring the aforementioned setup, it’s essential to examine the App class, which serves as the entry point to the codebase. This class typically initialises crucial components and sets up the application environment. In a multiplatform project, the App class may differ slightly between Android and iOS platforms, but its primary function remains consistent: to bootstrap the application and prepare it for execution.
Now, let’s delve into the screen class, where the API calls are made and other composable elements are declared. Within the class, UI elements are annotated using the @Composable annotation. This allows for the creation of dynamic and reusable UI components that can be composed together to construct the user interface.
Launching the app, at last!
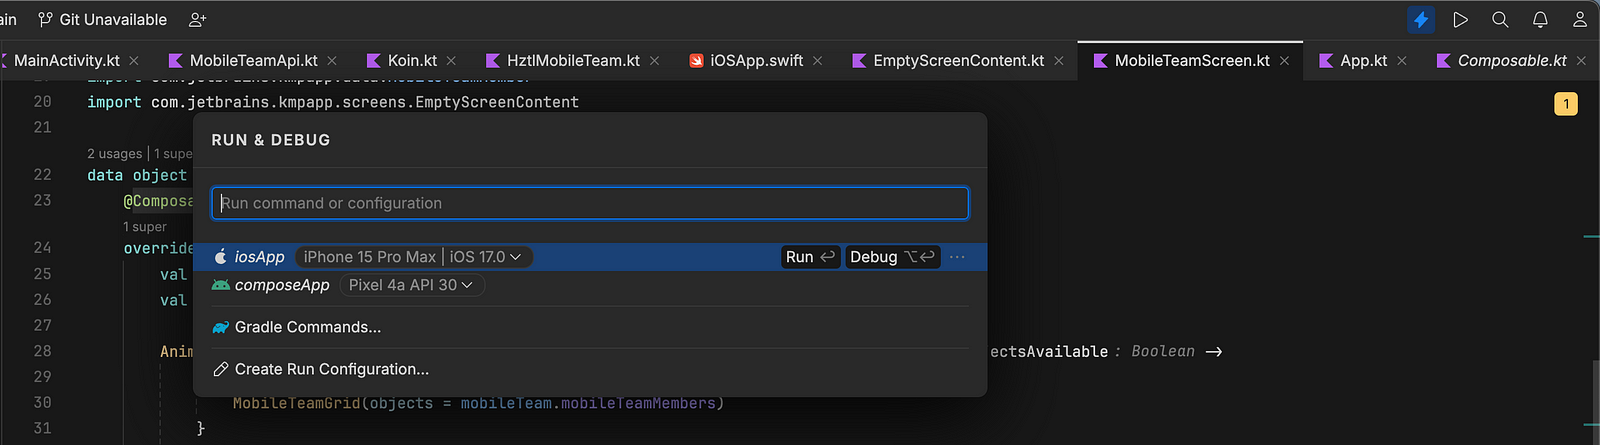
To launch the apps in the fleet, simply click on the play button located on the menu bar. Upon clicking, you’ll be presented with two options:
iOS app with available simulator.
Android app with available emulator.
Choose the appropriate option, and you’re all set to go. Tada!
Source Code
Access the Full Source Code: Unlock the Potential of Your Development. Please don’t forget to star the repository if you find it useful in any capacity :)
https://github.com/doshi-github/Compose-Multiplatform-Sample
Closing Thoughts: Embracing Compose Multiplatform
As we conclude this brief walkthrough of Compose Multiplatform, it’s remarkable to witness the seamless transition of Kotlin code across multiple platforms. As an Android Developer, the prospect of seeing your code run on various platforms is truly exhilarating - an idea that would have seemed far-fetched just a few years ago.
While it’s true that iOS support is still in its early stages and Compose Multiplatform itself is relatively new compared to other cross-platform frameworks, the potential it holds is undeniable. With its ease of adoption for Android Developers and the promise of broader adaptability, Compose Multiplatform stands poised to challenge frameworks like Flutter & React-Native in the realm of cross-platform development.
I am genuinely excited about the future of this framework and can’t wait to see how it evolves. If you’ve found this walkthrough helpful in any way, please consider showing your support by leaving as many claps as possible - it truly boosts my motivation to continue writing.
Thank you for joining me here, that’s all from me for now. Stay tuned for more content - Hoping to be back with a new blog soon. Until then, keep learning and keep exploring.
